Health & Beauty
Home Manicure 101: How to Do Your Own Nails
There is never a bad time to learn how to give yourself a manicure at home, whether you’re trying to save money or are hesitant to visit the salon. Not only can painting your own nails be satisfying (and save you money), but it can also have therapeutic benefits. So, here are the steps and supplies necessary to do it right the first time.
Step 1: Remove Nail Polish From Your Cuticles
To achieve a professional-quality manicure at home, devote as much time to nail maintenance as you do to polishing. Even if you don’t have polish on, you should drag a cotton ball dipped in remover over each nail to remove any oils or dirt that could cause the polish to bubble. Don’t neglect to use soap and water to wash your hands afterwards.
Step 2: Trim, File, and Buff
This is when you’ll want to break out your manicure kit. Depending on the situation, the nails may need to be trimmed beforehand. Then, file gently in one direction to obtain square, round, or irregularly shaped edges.
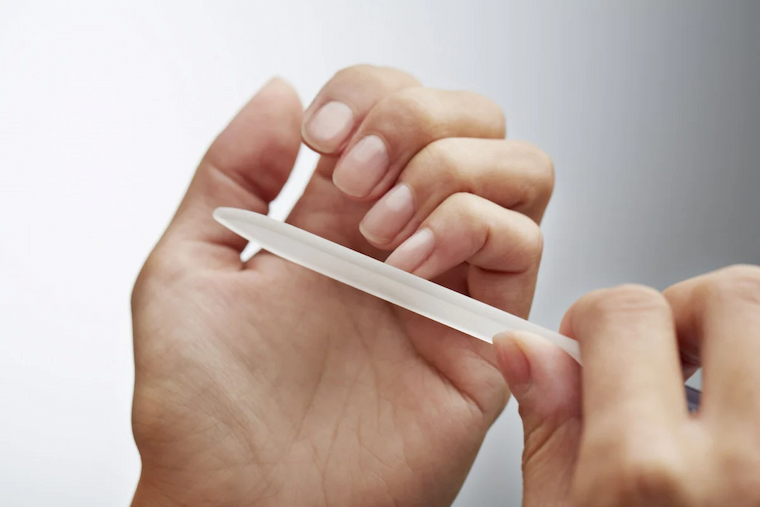
And don’t forget to gently buff over your nails since the natural oils in your cuticles can accumulate and leave a residue that ruins your manicure. Similar to brushing your teeth, buffing your cuticles brightens, makes them appear more youthful, and eliminates ridges.
For the ultimate nail care solutions at home, you should in fact avoid trimming your cuticles, as they protect your nails from bacteria and keep them soft. Soak your palms in warm water for five minutes, then push back gently with a cuticle stick.
Step 3: Hydrate the hands and cuticles
Moisturise now to avoid nail polish smudging afterwards. Rosehip oil, for instance, is a luxurious, lightweight alternative to a hand cream that is also optimal for cuticle hydration. Even if you’re not at a spa, you can still take a moment to decompress by giving yourself a quick hand massage. To complete the process, wipe each nail with nail varnish remover to eliminate any residue.
You can also apply a base varnish to hydrate, protect, and prevent chipping of the nails. Then, relax for a while. Experts recommend a two-minute interval between each coat, beginning with the base coat.
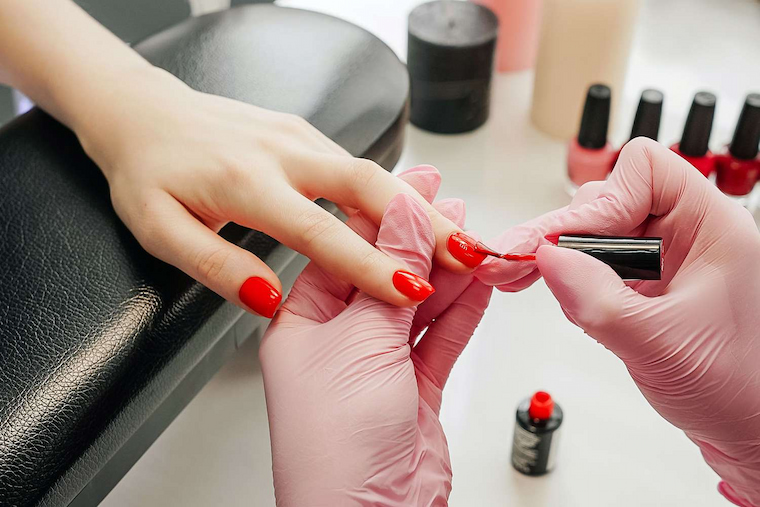
Step 4: Apply a Gel Polish
Here comes the exciting part: Apply a coat of the desired colour to your nails, making sure to reach the cuticle and the nail’s corners. Maximum coverage on the first coat makes the application of the second coat effortless. A pro tip from professionals is to keep the coating thin. Many of us use too many strokes and overburden the brush. The key is to load the brush with just enough polish to cover the nail in a single application. Or, you could attempt striping your nail three times: once down the centre and once on each side.
Instead of a regular nail polish choose your pigmented and lasting gel polish online if you want to upgrade your DIY manicure and make it last. The greatest advantage of gel nail varnish is that it lasts significantly longer than traditional nail polish. Gel varnish can actually last up to four weeks. It will not chip, break, or peel readily.
If your nails are especially fragile or prone to splitting, the gel can help strengthen and preserve them. A quality gel polish once applied functions as a natural barrier against dirt and toxins which the protection of nails, which endure a great deal of abuse during daily activities.
Most gel polish formulas contain acrylic monomers and oligomers that form a plastic film when exposed to ultraviolet light. This film is what keeps the polish in place and gives it a glossy finish. Given its inherent luminous and long-lasting features, this kind of product can instantly upgrade your manicure, making it look more professional.
Apply the second coat of gel nail polish after waiting two minutes. Translucent or translucent hues may require a third coat for complete, uniform coverage. Remember to maintain it as thin as possible. Alternatively, you can attempt press-on nails if you cannot wait.
Step 5: Finish With a Top Coat
A further advantage of using a high-quality gel polish online available is that you may not require a topcoat. But you will need it if you are painting your nails with conventional nail polish.
A topcoat protects your manicure from chipping and adds lustre to your nails; omitting it will significantly reduce the longevity of the paint job you just spent so much time perfecting. It is particularly important to secure any adorable nail designs you’ve attempted. Be mindful when applying your topcoat, as sloppy application can damage your manicure.
Step 6: Clean Up Around the Edges and Allow Nails to Cure
Wrap a cotton ball wet in nail polish remover surrounding the end of your cuticle stick and trace around your nails to correct any errors or uneven edges. Try folding a nail polish remover cloth into a triangle for a more precise application. The extra five minutes of drying time will be well worth it when you show off your nails and startle everyone by revealing that they were DIY.